
Generic SAML 2.0
Prerequisites
Before you start, make sure you have:
- At least one verified domain in Firmly Connect — see Verify a Domain.
- A SAML 2.0 application registered in your IdP that signs assertions and accepts the Service Provider’s (SP’s) Audience / Entity ID and Assertion Consumer Service URL.
- From your IdP, either:
- A metadata XML file describing the IdP, or
- The three values manually: Entity ID / Issuer, SSO URL, and the X.509 signing certificate in PEM format.
Firmly’s Service Provider details
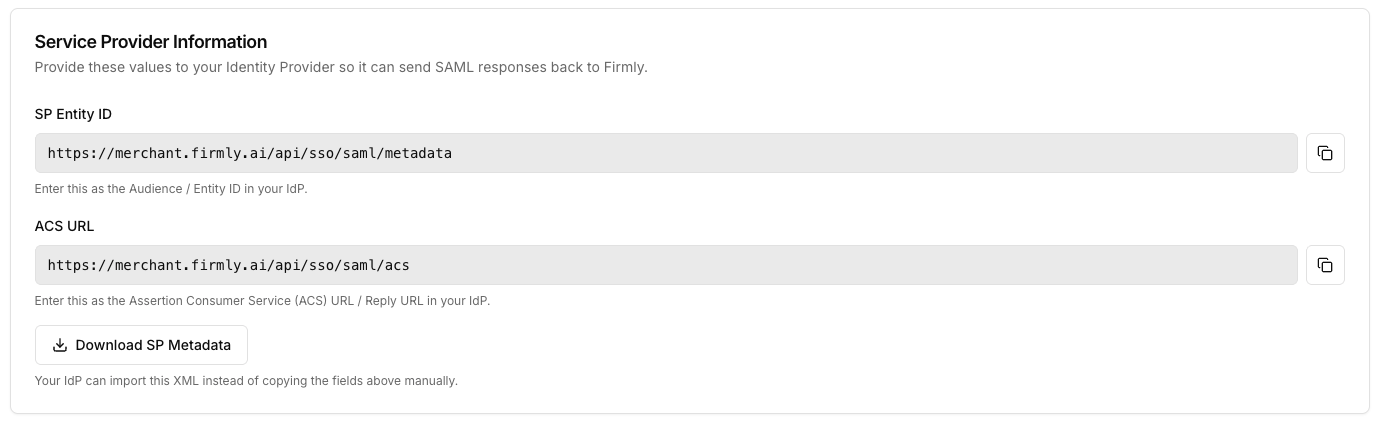
The IdP configuration form displays three Service Provider (SP) values that you provide to your IdP. Copy them from the Merchant Portal rather than guessing — they are deployment-specific.
| Firmly field | Where to use it in your IdP |
|---|---|
| SP Entity ID | Enter as the Audience / Entity ID / SP Identifier in your IdP application. Read-only on the Firmly form, with a copy button. |
| ACS URL | Enter as the Assertion Consumer Service (ACS) URL / Reply URL / Single Sign-On URL in your IdP application. |
| SP Metadata XML | Click Download SP Metadata to download an XML file. If your IdP supports importing SP metadata, upload this file instead of copying the SP Entity ID and ACS URL fields manually. |
Add a SAML Identity Provider
Open Settings → Single Sign-On
Navigate to the Single Sign-On page in your Merchant Portal settings.
Click Add Identity Provider
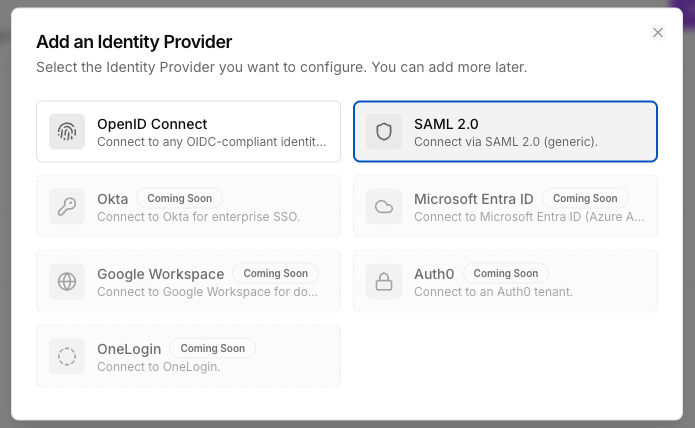
The IdP picker dialog opens with all available protocols.
Select SAML 2.0
Click the SAML 2.0 tile to open the configuration form.
Provide IdP configuration
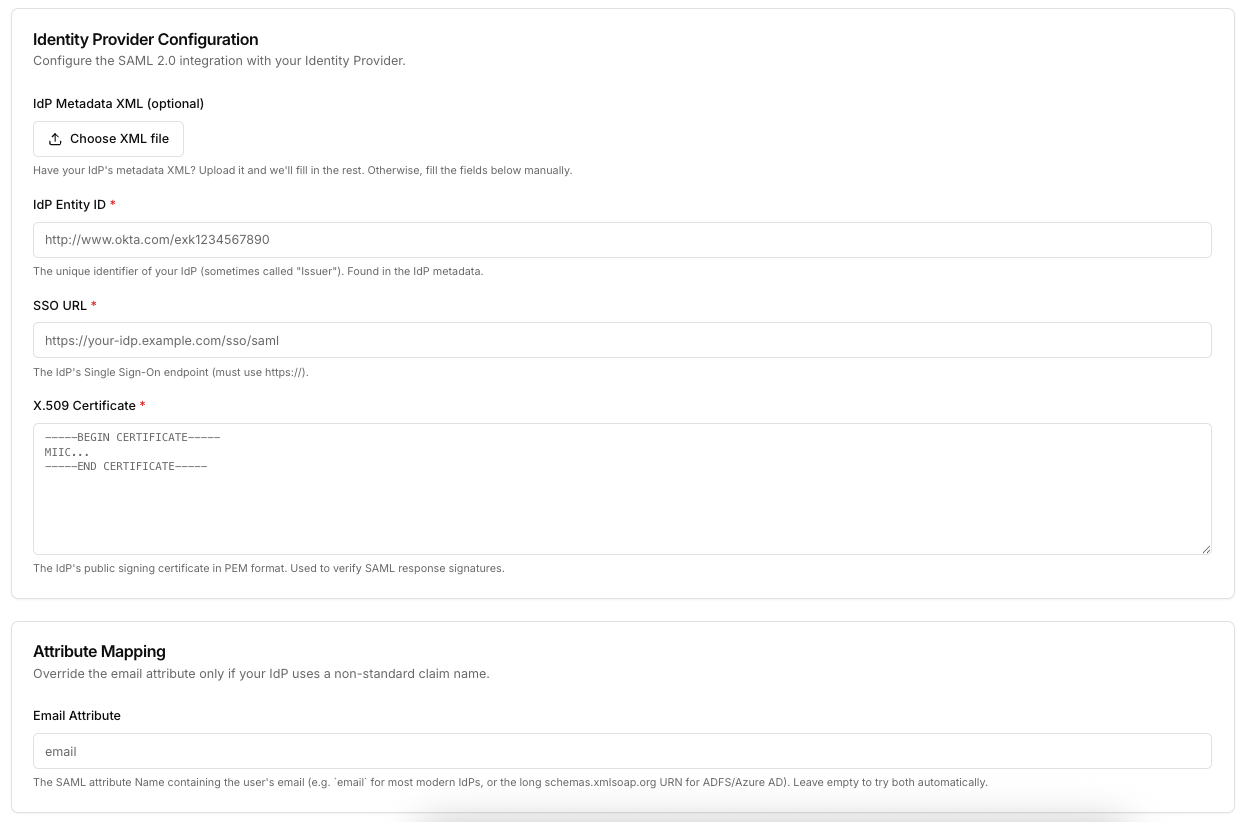
Either upload your IdP’s metadata XML for one-click setup, or fill in the three required fields manually. See Field reference below.
Click Save
The IdP is created in disabled state. You can now test it, bind it to verified domains, and enable it.
Fast path: upload IdP metadata XML
Most modern IdPs offer a downloadable metadata XML file describing the SAML endpoints and signing certificate.
- Download the metadata XML from your IdP.
- On the Firmly SAML form, click the IdP Metadata XML (optional) upload control and select the file.
- Firmly parses the file in your browser and auto-fills IdP Entity ID, SSO URL, and X.509 Certificate.
- Review the auto-filled values, edit anything if needed, and click Save.
The metadata XML itself is not stored — only the three extracted fields are persisted.
Field reference
| Field | Required | What to enter |
|---|---|---|
| IdP Metadata XML | No | Optional metadata XML file from your IdP. Auto-fills the three fields below. UI-only — the file itself is not stored. |
| IdP Entity ID | Yes | The unique identifier of your IdP, sometimes called Issuer. Example: http://www.okta.com/exk1234567890. |
| SSO URL | Yes | Your IdP’s Single Sign-On endpoint — the URL Firmly redirects users to in order to authenticate. Must use https://. |
| X.509 Certificate | Yes | Your IdP’s public signing certificate in PEM format, including the -----BEGIN CERTIFICATE----- and -----END CERTIFICATE----- lines. Firmly validates the PEM wrapper and base64 body, and uses this certificate to verify the signatures on SAML responses. |
| Email Attribute | No | The SAML attribute Name containing the user’s email address. Leave empty to try the common defaults automatically (email, mail, urn:oid:0.9.2342.19200300.100.1.3, and the ADFS …/claims/emailaddress claim). Set this if your IdP emits the email under a different attribute name. |
NameID and user matching
Firmly Connect uses the email returned by your IdP to look up the user. Configure your IdP to:
- Send a
NameIDin any stable format — Firmly matches users by the email attribute, not by NameID, so the NameID format doesn’t affect matching (aurn:oasis:names:tc:SAML:1.1:nameid-format:emailAddressNameID is fine but not required). - Include an email attribute in the SAML assertion. By default Firmly checks the common email attribute names —
email,mail, the SAML2 email URNurn:oid:0.9.2342.19200300.100.1.3, and the Microsoft/ADFS claimhttp://schemas.xmlsoap.org/ws/2005/05/identity/claims/emailaddress. If your IdP uses a different name, set the Email Attribute field to that exact name.
The email’s domain portion must match a verified domain that is bound to this IdP. Sign-in for users whose email domain is not bound to this IdP will be rejected.
Bind the IdP to verified domains
The IdP configuration form includes an Authorized Domains section listing every domain you have verified. Each verified domain appears as a toggle.
- Turn on the toggle for each domain you want this IdP to handle.
- A single IdP can be bound to multiple domains.
- A single domain can be bound to multiple IdPs (users will be presented with a choice at sign-in).
- At least one domain must be bound before the IdP can be enabled.
Enable the IdP
The Enabled toggle at the top of the form becomes available once:
- All required fields are filled and pass validation (including a well-formed PEM certificate), and
- At least one verified domain is bound under Authorized Domains.
Toggle Enabled on to make the IdP usable for sign-in. A disabled IdP keeps all its configuration but cannot complete authentication for any user.
Test the connection
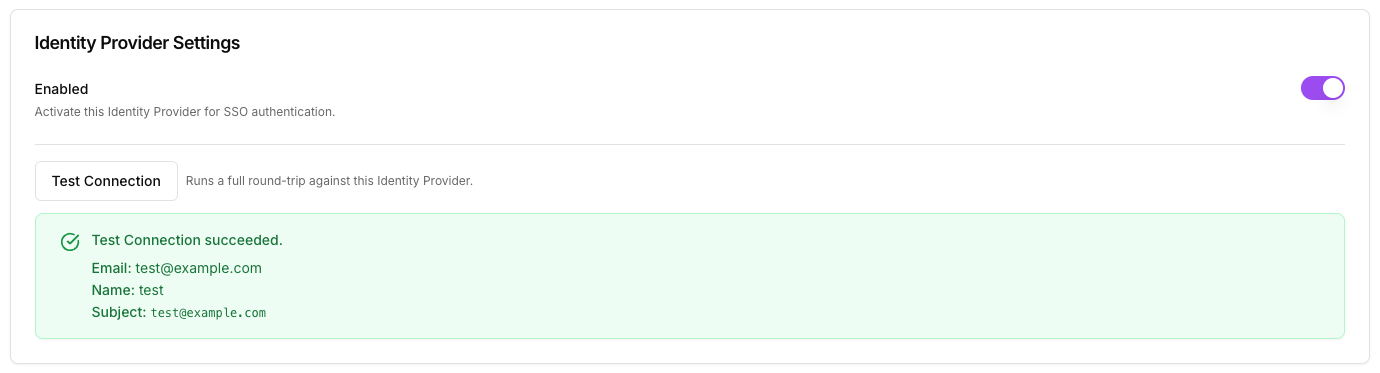
The Test Connection button appears on the IdP form in edit mode (after the initial save), provided there are no unsaved changes and all required fields are filled.
Clicking Test Connection performs a real SAML round trip against your IdP:
- Firmly redirects you to your IdP’s SSO URL with a SAML AuthnRequest.
- You authenticate with a real account at your IdP.
- Your IdP posts a signed SAML response back to Firmly’s ACS URL.
- Firmly verifies the response signature against the configured X.509 certificate, validates the audience matches the configured SP Entity ID, and extracts the email attribute.
On success, the form displays the extracted attributes. On failure, it displays a formatted error pointing to where the round trip broke down (for example, signature verification failure, audience mismatch, missing email attribute).
Update the certificate
When your IdP rotates the SAML signing certificate (typically annually):
- Obtain the new certificate from your IdP — either as a fresh metadata XML, or as a PEM-formatted certificate.
- Open the IdP configuration in Firmly Connect.
- Either re-upload the new metadata XML (which refreshes all three fields), or paste the new PEM into X.509 Certificate directly.
- Click Save, then run Test Connection to confirm the new certificate works.
There is no separate “rotate” workflow — updating the field and saving is the rotation.
Disable or delete the IdP
- Disable — turn the Enabled toggle off on the form. The configuration is preserved, the IdP is removed from sign-in, and any domain enforcement that depended solely on this IdP becomes unavailable.
- Delete — from the IdP row’s actions menu on the SSO page, choose Delete. This is a hard delete, recorded in the audit log, and will unbind the IdP from any domains that referenced it.
Troubleshooting
-----BEGIN CERTIFICATE----- and -----END CERTIFICATE----- lines intact and no extra whitespace.http://schemas.xmlsoap.org/ws/2005/05/identity/claims/emailaddress or urn:oid:0.9.2342.19200300.100.1.3) — paste that exact string.